I can’t believe tomorrow is the beginning of March! The Minecraft Challenge is coming to a close and I am really looking forward to the “Old Timey Newspapers” session with Lisa Read on Thursday (scroll down to learn more). Today I discovered two really cool little tricks that I am excited to share with you. The first one enables you to create a link that takes you to a specific section of an article or website in Google Chrome and the other super cool trick is for iPhone/iPad users (Hint: when you are looking at photos did you ever notice a little sparkle by the i underneath?).
Creating a Link to Specific Text on a Page:
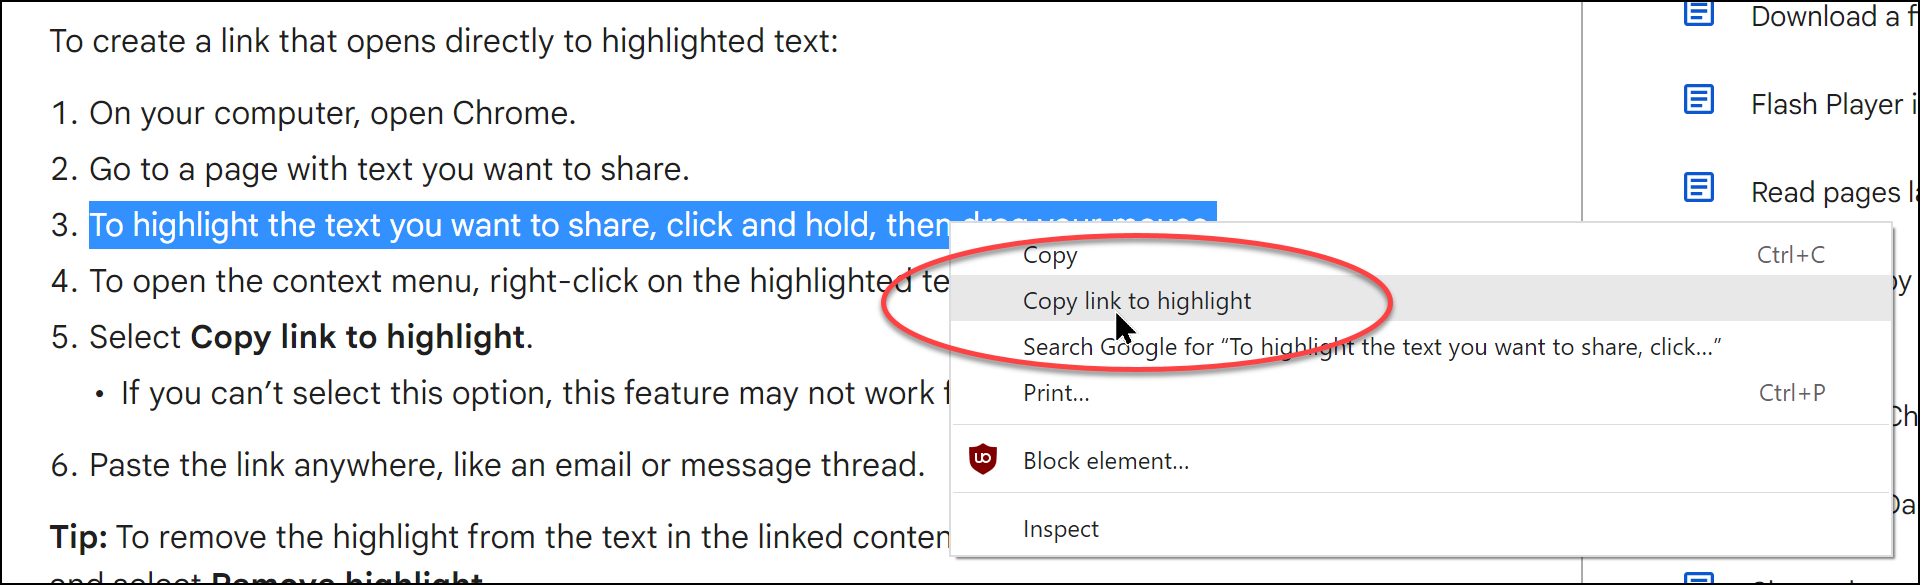
You can create a link to a specific spot in an online page and share it so the receiver does not have to read an entire article to get to the spot you intend them to see.
Here’s how:
1. Use Google Chrome
2. Locate the text that you would like to share
2. Highlight the part of the article that you would like to direct the reader to.
3. Right click and click on Copy link to Highlight
4. Now you can share that link and the receiver will be able to open it directly to the selection you highlighted (and yes, it is still highlighted)
*This also works on ipads/iPhones and Android devices
Visual Look Up on iPhones and iPads:
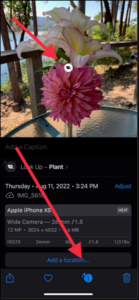
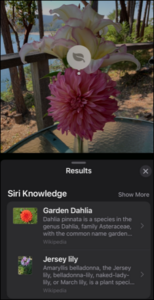
This one is so awesome! I noticed a little sparkle by the i under a photo of a flower arrangement that I took. After looking it up I discovered that if you click on the i it will bring up more information about the object of the photo. This works for popular landmarks, statues, art, plants, pets, and more!
How it works:
1. Open a photo that is of something that may be identifiable (plant, animal, landmark…)
2. Click on the
if one appears (not all objects will get this-only ones that can be looked up)
3. Now click on the image that appears on your photo and you will see the information underneath.


Happy Pancake Tuesday/Mardi Gras/Shrove Tuesday! Today I am excited to share the new Microsoft Search Coach. The Search Coach was designed to help people learn how to ask effective search questions to get the results they desire and to help them arrive at safe accurate results while avoiding fake news. Search coach will give you suggestions to make your search better. It is basically described as a search engine on training wheels. To me it looks like a game changer for teaching students how to search (I think I am going to try it out too).
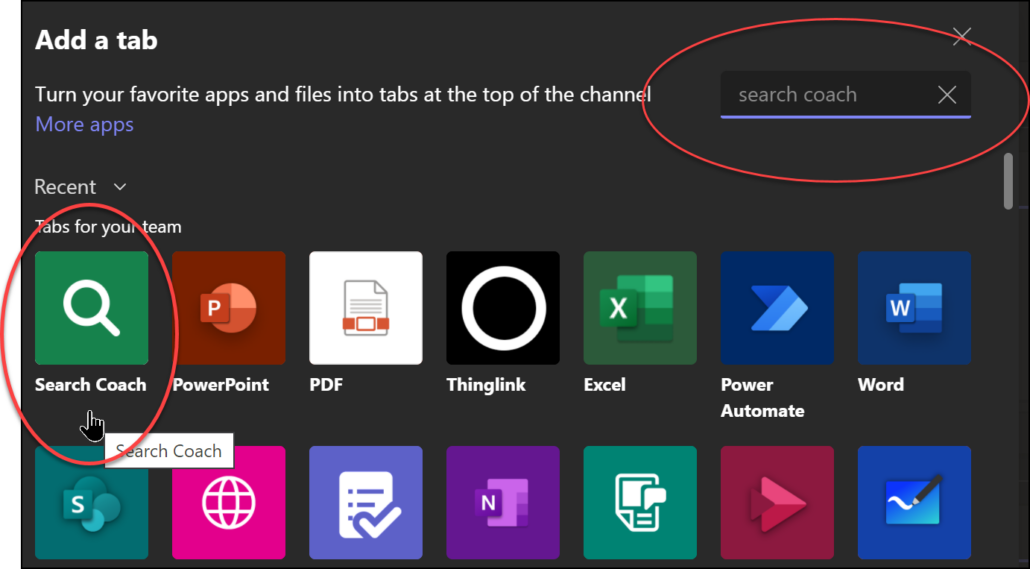
Right now for your students use it, you need to add it to your class Team for them. It should be in the Edge browser by the end of 2023. Here’s how to add it to your Team:
1. Open your class Team
2. Click on General on the left.
3. Click on the + sign at the top
4. In the search space type in Search Coach
5. Click on the Search Coach and then click Save at the bottom. It will now be one of the tabs at the top that your students can access.

One really handy thing to do when you are working with a group of people is to set up an email list or group. I didn’t realize that there was a difference between the two and I admit I had to learn a bit to get today’s Tech Tip ready. Read on to learn the difference and find some instructions to help (thank you Julie for this awesome Tech Tip idea). Oh and don’t forget to check out the fun Halloween links that I have updated for this season: Click here for Halloween Fun
Difference Between a Group and a List:
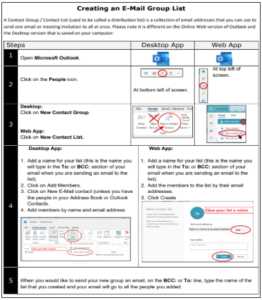
An email Contact List/ Contact Group (used to be called a Distribution List) is a collection of email addresses that you can use to send one email or meeting invitation to all at once. To confuse us, , Microsoft calls this a Contact List when you are working in the online web app but if you are on your desktop app on your computer it is a Contact Group.
An email Group is a collection of people (entered by email address) that get an email address for conversations, a space for shared files, a group calendar and more. It is a bit like a Team.
If you just want an easy way to send a group of people emails and meeting invitations, the Group list is the best choice. If you have a group that you would like to plan with and work together, a Group is better.
How to Create a Group List/ Contact Group
This week’s Tuesday Tech Tip comes from Jane Rondow (Inclusion Teacher – Assistive Technology)-thank you, Jane! Also, please read on for information about the Minecraft Challenge, upcoming Minecraft workshops this Friday and a Mathletics workshop on Thursday.
October is Dyslexia awareness month, 1 in 5 people have dyslexia and many don’t even know.
Comox Valley Schools has made many Assistive Technology supports available on all district computers and devices to support Reading and Writing. These can also be used on personal devices and BYOD (Bring Your Own Devices) using your Microsoft login.
Microsoft Login
- Educators: district email and login password
- Learners: student#@learn71.ca and login password
A few supports are:
-
- Immersive Reader in Office 365 and Edge Browser
- Read&Write
- OrbitNote
- Speak Selection and Speech Controller
-
- Font options like Open Dyslexic Font
- Coloured backgrounds
- eText and eBook resources
- ARCBC alternate format materials (Textbooks, Novels, Books)
- Dictation (Speech to Text/ Voice to Text)
-
- Dictate
- Windows Speech Recognition
- Enable Dictation
To find out more about these Assistive Technology supports and tools check out the resources on:
- Learn 71 – Assistive Technology
- Made by Dyslexia and Microsoft
Or contact Jane.Rondow@sd71.bc.ca (District Inclusion Teacher – Assistive Technology)
This Tuesday I am thrilled to announce this year’s Minecraft Challenge – The Perfect Future City! Read on learn more details about this and how to find some awesome free lessons to go with Minecraft. Tracy Richards and I are also excited to let you know that we will be doing two “Minecraft in the Classroom” workshops on October 21st. Read on to learn more!

The year is 4023 and our world looks nothing like it used to. Your challenge is to use Minecraft to design a city in the future. Will this city be on Earth, under the Earth, in an extreme biome, floating in space, underwater or on another planet? It is all up to you. Please watch the video below to learn more and visit Learn71.ca and click on Minecraft Challenge to find resources and more.
I know that everyone is looking forward to our Thanksgiving weekend. I have lots to be thankful for this year 🙂 I am hoping you will also be thankful for this new resource that we have subscribed to. We joined the National Film Board a few years ago and brought you many all time classics like “The Sweater” and my favourite ,”The Great Toy Robbery”. Now the National Film Board has an Educational Campus that brings us Educator Guides, Lessons, curated playlists (I just found one on Stop-Motion animation) and the ability to search by subject. It also gives you access to more than 5800 English, French and Indigenous language National Film Board productions including documentaries, animation and interactive resources.
Click here or click on the picture to open the instructions and more information about the National Film Board Campus
To find our link to the National Film Board:
1. Visit Learn71.ca
2. Click on Research Databases on the right
3. Click on Videos
4. Click on the National Film Board link
5. After you sign up and sign in for this one, you need to sign in for the Campus. Scroll down on the right and you will find a registration link:

6. After you click on Check Here, type in your school name or Comox and you will find our district name there
7. I think you need to write to them to ask for the code.
I am so happy to have heard from so many people last week and I am so sorry that I neglected to give the instructions for how to get into Canva (oops). Please read on for instructions for how to get in to Canva. Many teachers moved classrooms over the summer or got a new Brightlink (Epson) projector installed in your classroom and some moved into a classroom with a Smartboard. Read on for some support to help you use your projector for interactive projects and engaging activities. If you are new to ePortfolios or have been doing them for years and have knowledge to share, read on for information about our Work and Sharing Session tomorrow afterschool.
How to Get in to Canva:
The easiest way for teachers and students to get in is to:
1. Go to canva.com
2. Click on Log In in the top right
3. Click on Continue in Another Way (Continue with email works too)
4. Choose to log in with your Microsoft Account
5. Now just log in using your school district email address and regular password.
Brightlink/Smartboard Support
If you have an Epson Brightlink projector in your classroom you should have pens that work with it making it interactive. Look for a play button on the side or controls on the bottom that enable you to switch the pen between being a drawing/writing tool and a mouse clicker.
If you have a play button on the left or right side, click here for some instructions to help you.
If you have a very new Brightlink with controls at the bottom, click here for some instructions to help you.
If you are using a Brightlink or a Smartboard, Lumio is fabulous program to use with it.
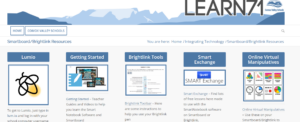
Visit Learn71.ca, click on Integrating Technology, then click on the Lumio/Brightlink/Smartboard button on the right. to find links to help you get started with Lumio. Also check out all the amazing virtual manipulatives that you can use with your students to teach Math.
I know that I have told you all about the awesomeness of Canva before but this year, it will be even easier for you to use as our whole district, staff and students, have been signed up for accounts. Woo hoo! Canva is a great, easy program to use to help you and your students create amazing info graphics, videos, presentations and more. You can collaborate and share just like you can in Office 365 and there are thousands of visually engaging templates that you can edit to make your own.
Some Features:
- Your education account gives you free access to all the graphics
- Talking Presentations – you can turn your presentations into a video with you in the corner
- Comic Strips – assign your students comic strips in Canva to show their learning. They can even make multimedia comics with animations and music
- Storyboards- have students use the storyboard templates to plan ahead or share learning
- Video projects -you and your students can create easy video projects with templates to help you get started, and photos and video clips that you can add
Resources in Canva:
- Design School – Start here to watch videos or take courses to teach you the skills you need to start using Canva. You can even direct your students here for support for students.
- Educator Resources
I hope everyone’s fall is off to a great start. I am super excited about this year and am looking forward to bringing some of our fun district events back like the Code Quest Arcade in May and the Minecraft Challenge which will come out soon. One great new resource that has come to our district is Live It Earth! Live It is a Canadian resource which is available in English or in French and contains full lesson packages for Science/STEM lessons that closely follow our curricular Big Ideas. The subjects include such engaging topics as Life on Mars, Narwhals, Dinosaurs, Climate Change and much more with a new one coming out every month. Each package contains:
- A Slideshow that you can edit or change that is also narrated if you would like to give your voice a break
- An Inquiry Guide full of working documents that you can modify for students to fill out as you progress through the unit.
- Creative and STEM Challenges with lots of choices and step-by-step instructions
- A Feature Show about the topic which also includes the Indigenous perspective
- Career Pathways
- Self Assessment opportunities
- Post Viewing Challenges and Resources like Game Challenges, Call to Action, Deep Dives and more