
Woodwork 9/10
COURSE OBJECTIVE:
The objective of this course is to introduce students to hands-on skills in woodworking. Students will walk away with an understanding of taking wood from its raw form as lumber and being creative with it to form a variety of different types of projects. The importance of safety and understanding while working machinery in a shop is a key component of the course. This course is hands on!!
Machine Safety
The following is a list of tools that involve students moving through a safety process that involves a demonstration, quiz, first use observation and ongoing supervision. The included links lead to documents that highlight the safety knowledge that all students must exhibit understanding of in order to use the tool.

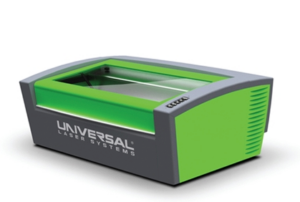 Laser Engraving and Inkscape Tutorials
The Laser Engraver is a great addition to the Woodshop that opens up an endless array of projects and enhancements to projects that students can do.
Desk Plate/Sign/Fridge Magnet
(WOOD PROVIDED by Mr. Claassen)
Tutorials #1 – An introduction to Using Inkscape
Tutorials #2 – Text, Images & Tracing
Tutorial #3 – Going from Inkscape to the Laser Software
Tutorial #4 – Focusing and Cutting on the laser
“Starter” Laminated Project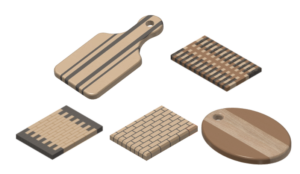
All students will start off with a simple laminated project to get back onto the tools & machines. Examples of this project include, but are not limited to; a set of coasters, cutting board, wall clock, cnc routed wall sign, charcuterie board, checker board, crib board. The incorporation of the laser and CNC Router are strongly encouraged!
Autodesk Fusion 360 is industry standard 3D Modelling software. Students will use the software to create a three dimensional model of their project. Once created, 2 dimensional ‘working drawings’, or plans, will be generated which serve as a guide to the machining and assembling of the project.
Project Design Constraints:
- Project Planning – Your project will be modeled in 3D using Fusion 360
- Size
Overall Length & width – maximum 16″ (405 mm) in length and 12″ (300 mm) in width
Thickness – finished thickness of your cutting board shall be 3/4″ (19mm)
Single Board – no single board shall be wider than 3″ - # of Boards – your design must use a minimum of 4 pieces of wood to demonstrate your ability to laminate
- CNC/Laser – your design should incorporate the use of both the CNC router and the Laser engraver in an effort to enhance the finished product and demonstrate the ability to operate these tools.
- Working Drawing (plan) – from your completed model in Fusion, a dimensioned working drawing will be produced that will be used during construction of your project.
- Bill Of Materials – a Bill Of Materials must be completed before you start the project
- Wood Restrictions
Wood species must be chosen from those identified in class
Black Walnut/Purple Heart wood is only to be used for accent pieces ($$$)
Laminated project 2024 Procedure
Laminated Project Assessment 2024
Bill Of Materials – Revised 2025 (Download and Open)
Laminated Project Tutorial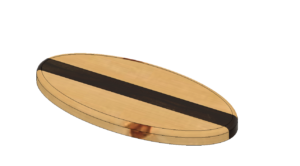
These are the basics of Fusion to get you started drawing projects for woodwork. Follow this tutorial to design your laminated project.
Sketching and Starting a New Component – Part 2
Copying a piece and the Do’s and Don’ts
Joining components together – Part 4
Filleting and fixing a copy/joining – Part 5
3D to a 2D Working Drawing – Part 6
CNC/LASER Tutorials
Basic Table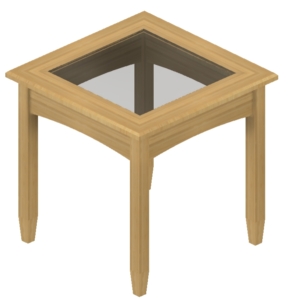
This is a basic tutorial on how to draw an end table. It builds on previous knowledge and explains how to use Fusion and “Copy” and “Paste” to simplify drawing a project in 3D.
Follow this tutorial to design your own Table.
Small Table Tutorial – Part 1 (Drawing the leg/rail and “Copy/Join” parts)
Small Table Tutorial – Part 2 (Finish Table assembly with Copy/Paste/Joint)
Small Table Tutorial – Part 3 (Changing dimensions/Chamfers)
Small Table Tutorial – SOLID TOP
Small Table Tutorial – 4 PEICE TOP (Part 1)
Small Table Tutorial – 4 PEICE TOP (Part 2)
Highland Drawing Template (With Updated Title Block)
Small Table Tutorial – 3D to the 2D drawing
End Table Procedure Sheet – 2024
Bill Of Materials – Revised 2025 (Download and Open)
Bar Stool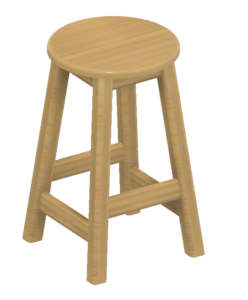
This is a basic tutorial on how to draw a Bar Stool. It builds on previous knowledge and explains how to use the Chamfer, Pattern Mirror functions to simplify drawing a project in 3D.
Follow this tutorial to design your own Serving Tray.
Bar Stool – Part 1
Bar Stool – Part 2
Bar Stool – Part 3
Bar Stool – Part 4
Bar Stool – Part 5
Bar Stool – Part 6
Bar Stool – Part 7
Bar Stool – Part 8
Bar Stool – Part 9 (The Drawing…)
Highland Drawing Template (With Updated Title Block DOWNLOAD)
Bill Of Materials – Revised 2025 (Download and Open)