Wood Technology 10
Wood Technology 10 incorporates modern ‘traditional’ woodworking with the use of new technology (Laser cutter and CNC Router).
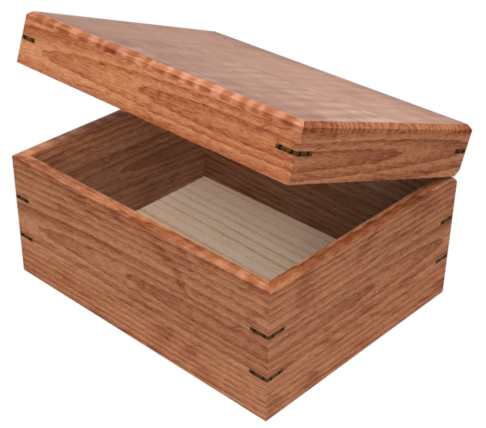
The ‘Main’ course project will be a ‘keepsake box’. Students will begin by designing their box using professional level 3D modelling software. Using their 3D project models, students will produce a set of working drawings (plans) that will be used throughout the manufacturing process. Upon completion of the main project, students will select and complete a secondary project dependent on demonstrated skill level an time remaining.

Mitred Keepsake Box
No, it’s not ‘just’ a box, it’s a piece of fine woodworking that involves many process, all of which take care to detail for the box to display your woodworking prowess! Many woodworkers specialize in making nothing more than wooden boxes and never seem to get bored as there is seemingly no end to the designs that can be dreamt up.
Design Unit – Autodesk Fusion 360
We’re going to get started by learning how to model objects in a 3D computer environment, ‘3D modelling’. A series of video tutorials will guide you through using Fusion 360 to model your box and help you to create a set of plans to build the box from.
Setting Up an Account and Obtaining An Education License
You will need to setup an Autodesk account and apply for a Fusion 360 free education license. Follow the instructions in class to first set your account up and next, to have your student status verified.
- Fusion 360 can run in Chrome – click here for browser access
Tutorial Series
- Keep in mind the useful features built in to YouTube when working through tutorials (something you will be doing often).— Pause, rewind, slow down & speed up
- Upon completion of EACH tutorial show your teacher to receive marks!
Getting The Basics (start here!)
Modelling the Mitred Box Lid
- Tutorial 1 – Creating the Front and Back sides
- Tutorial 2 – Creating the Left and Right sides
- Tutorial 3 – Joining the sides to one another
- Tutorial 4 – Creating the Top for the Lid and Joining
Modelling the bottom
- Tutorial 5 – Creating the bottom sides using the top sides
- Tutorial 6 – Creating a slot for the inset bottom
- Tutorial 6b – Creating and Joining the Inset bottom
- Tutorial 7 – Chamfering for hinge movement
- Tutorial 8 – Obtaining the hinge
- Tutorial 9 – Creating holes for the hinge
- Tutorial 10 – Inserting the hinge and joining the lid to bottom
- Tutorial 11 – Creating plans to build from
- you will need a ‘working drawing’ for each unique piece that is to be made (example: For the standard 10″ x 10″ box, the front, right and left sides of the bottom are the same, so one drawing is all that is needed)
Mitred Box – Make
Design done? Plans Printed? Now it’s time to get making. Follow the Keepsake Box – Procedure to make your project (there are printed copies in the shop). Expect demonstrations of the various processes when the timing is right.
Secondary Project Selection
Done the main project? It’s now time to select a secondary project. Some Ideas can be found on THIS PAGE.
If you would like to make a self-driven project, which will be a bit more involved, see THIS Page to determine if this is for you.
Machine Safety
The following is a list of tools that involve students moving through a safety process that involves a demonstration, quiz, first use observation and ongoing supervision. The included links lead to documents that highlight the safety knowledge that all students must exhibit understanding of in order to use the tool.
- General Shop Safety
- Mitre Saw Safety
- Jointer Safety
- Table Saw Safety
- Thickness Planer
- Router Safety
- Band Saw Safety
- Drill Press Safety
