
Happy Tuesday! Ever find yourself working late at night or early in the morning, only to hesitate before hitting “send” on an email because it’s not quite the right time? Or maybe you’ve crafted the perfect message for your students or colleagues, but want it to arrive at just the right moment. This week’s Tech Tip is all about the Scheduled Send feature in your email platform! Read on for instructions for how to schedule when your emails will be sent. Don’t forget, if you are interested in learning Minecraft, join Kara this Friday and our Tech Survivor Dinner Series is almost full so please sign up soon if you would like to join us. Jane and Shannon are putting on a series of workshops about Enhancing Student Learning with Inclusive Tech Tools. Scroll down to learn more about these or register for them!
Scheduling Email Sends Five Different Ways
(Classic Desktop, Online Webmail, New Desktop, iPhone, Android):
Classic Outlook on your Desktop:
1. Write your email like you normally would
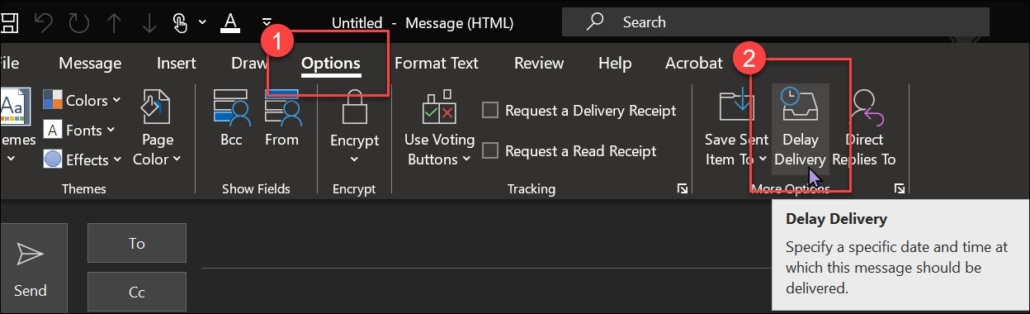
2. Click on Options at the top and then click on Delay Delivery
3. Fill out the section on Delivery Options. Make the Do not Deliver Before time the time you would like it to send.
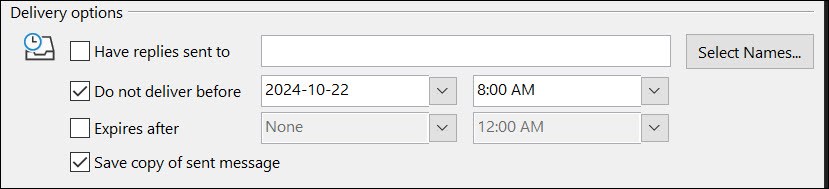
4. You will need to have your computer turned on and email open at the time you would like the email to send. Ex. For the one above, any time after 8:00 AM that I open my email, that email will automatically send.
Outlook Webmail:
If you are using Outlook online follow these instructions:
1. Compose your email as you normally would.
2. Click on the arrow to the right of Send and choose Schedule Send
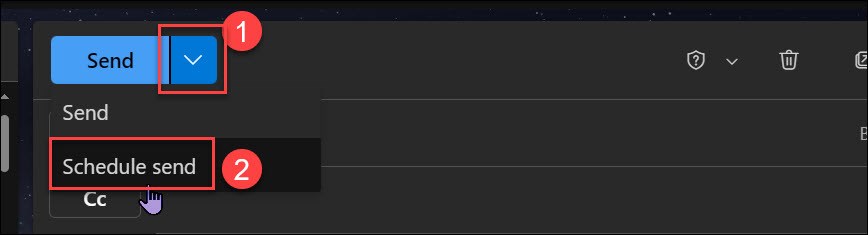
3. Choose one of the options that they give you or pick Custom Time and put in your own date and time.
4. Make sure your computer is on when that time comes.
New Outlook on your desktop:
If you are using the new Outlook on your Desktop computer, it is a little easier. You are welcome to use the new version (click the slider in the top right to switch). It can be a little glitchy still
1. Compose your email as you normally would.
2. Click on the arrow to the right of Send and choose Schedule Send
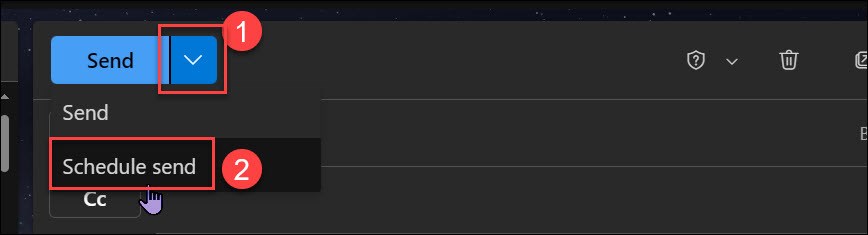
3. Choose one of the options that they give you or pick Custom Time and put in your own date and time.
4. Make sure your computer is on when that time comes.
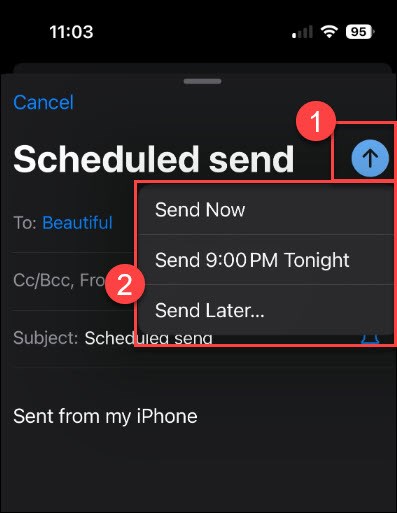
On your iPhone:
1. Compose your email like you normally would.
2. When you press the send arrow, hold your finger down for a few seconds.
3. Select the choice that you would like
On Your Android Phone:
Unfortunately, I don’t have an Android phone but this is what I found when I looked it up:
- On your Android phone or tablet, open the Gmail app .
- At the bottom right, tap Compose.
- Create your email.
- At the top right, tap More .
- Tap Schedule send. select an option.
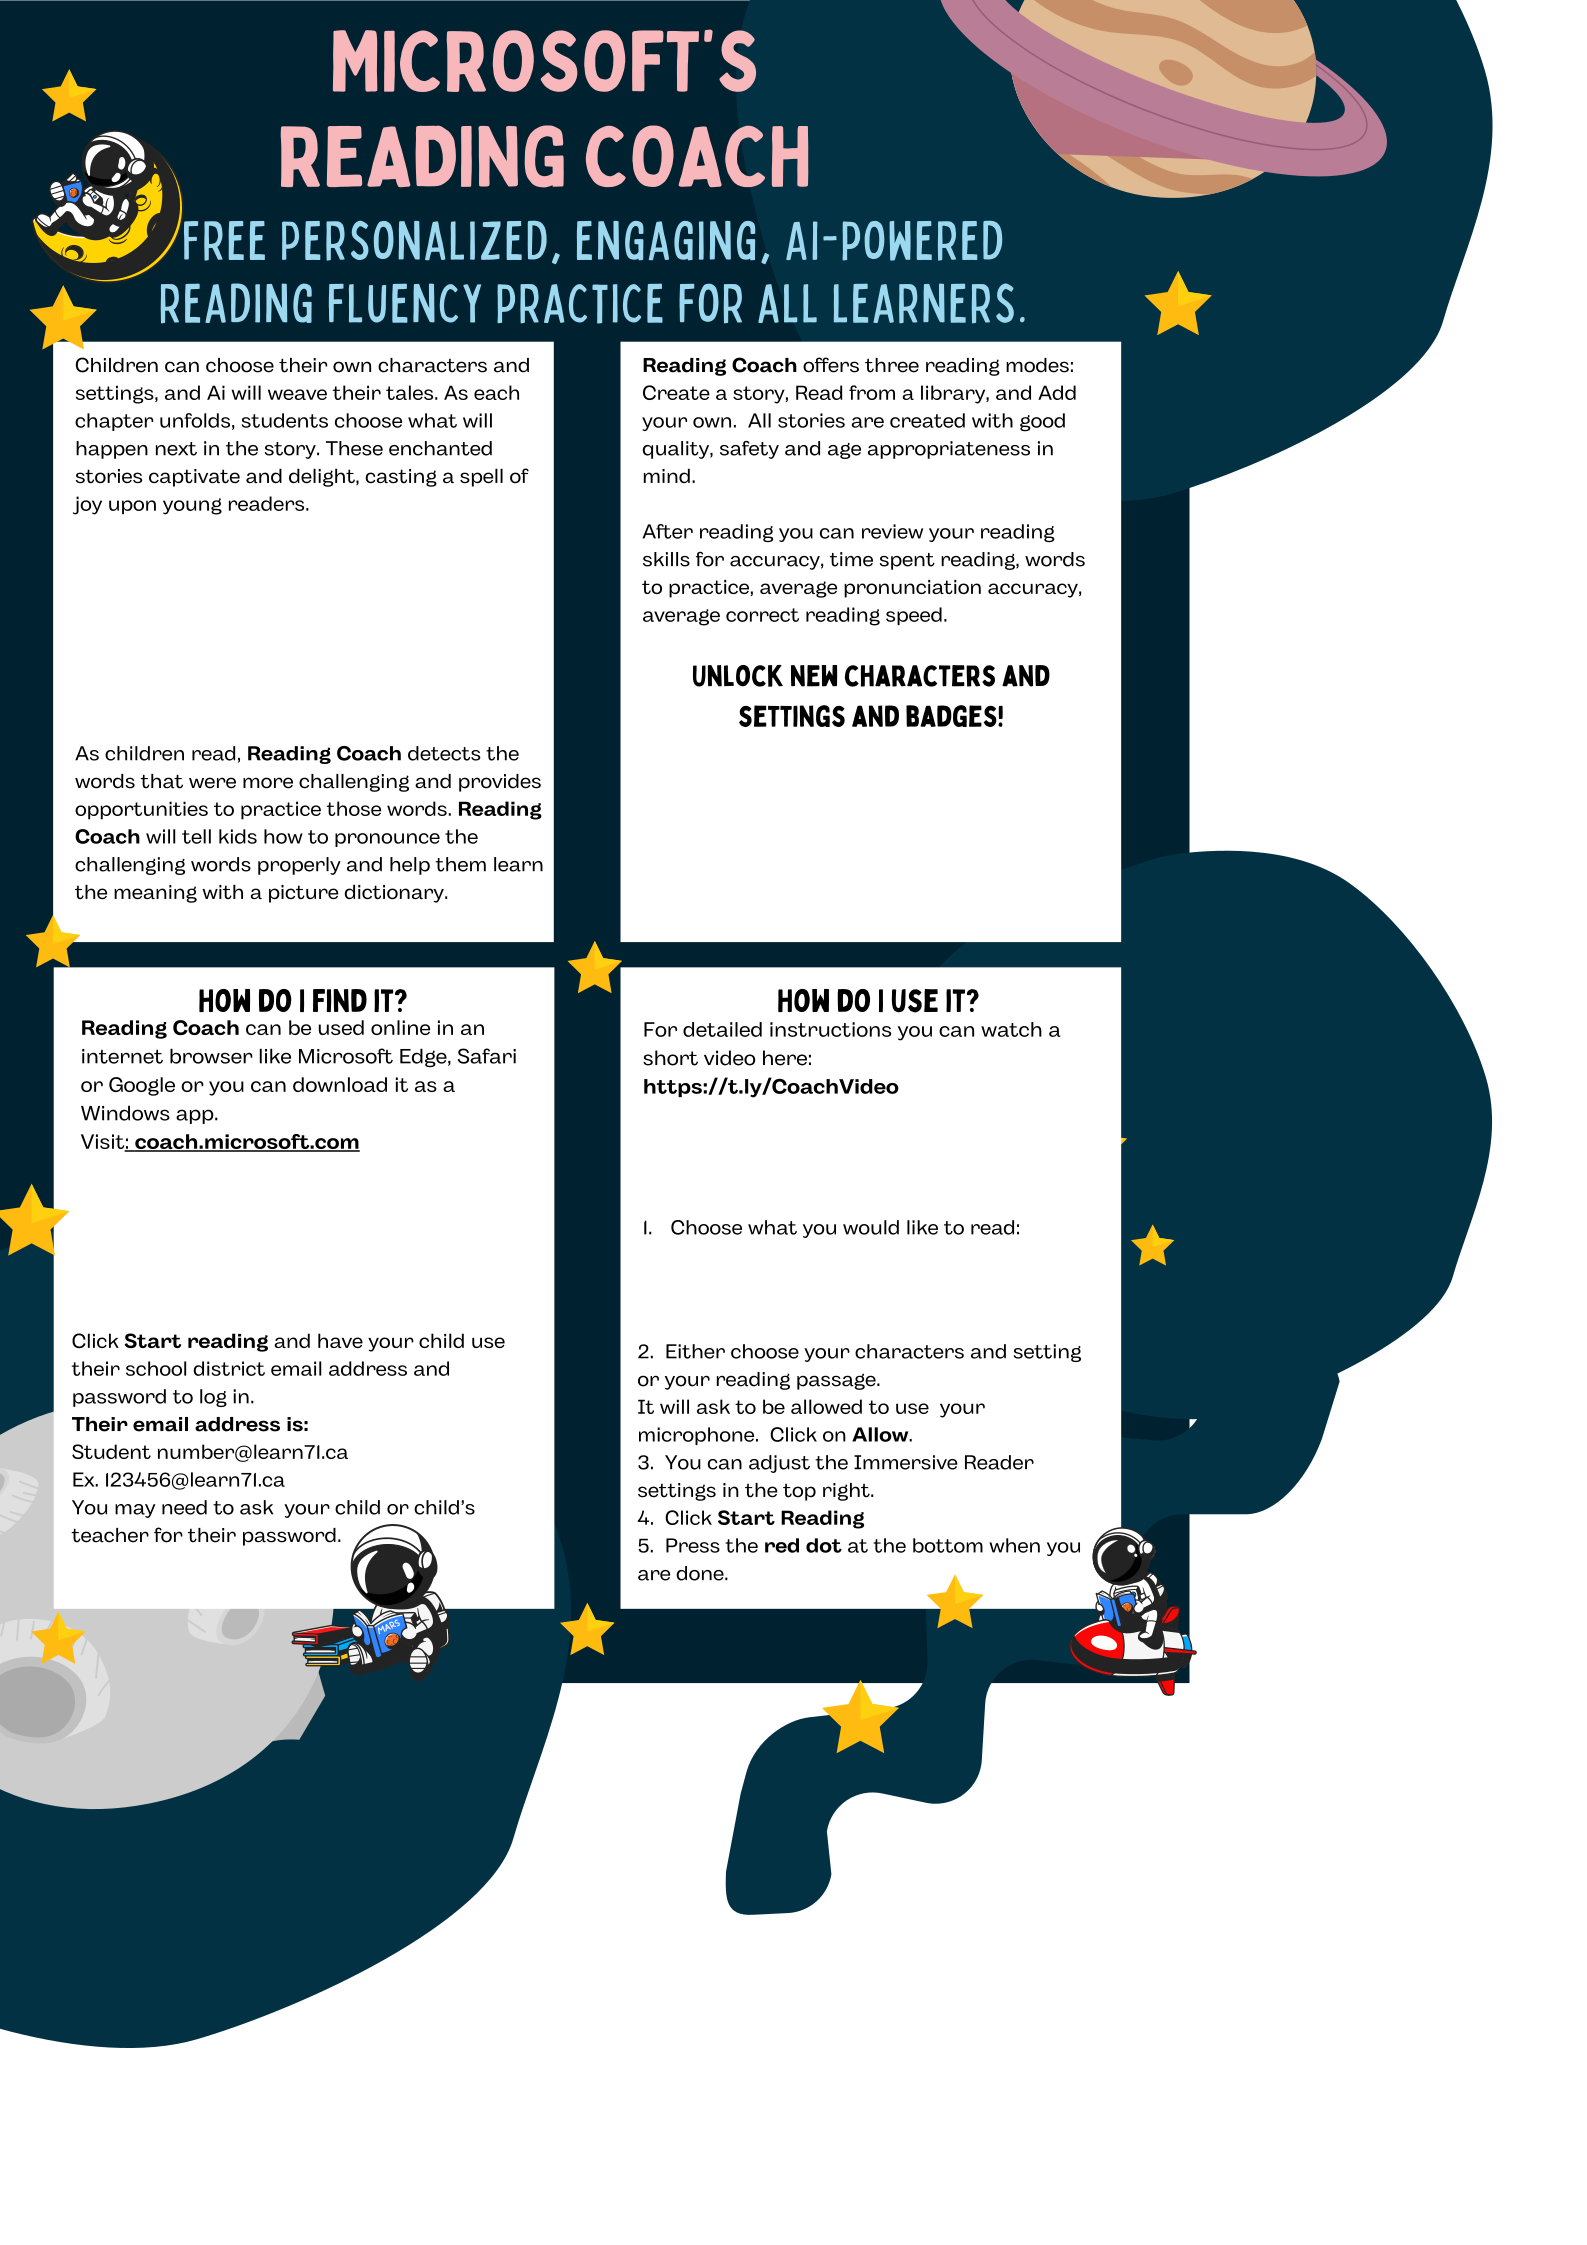
I am super excited this week to share the new Microsoft updates with you! Those of you using Reading Progress should see AI Generated Passages as one of your reading passage options and the program will keep track of the words students are struggling with and will add those words to new reading passages (I know, this is so cool!). Teams Assignments now have AI generated assignment descriptions! You choose your topic and let it run, add sparkle, more details, step by step instructions and then have it make a rubric for you! (Sorry about the exclamation marks-I’m really excited about these!) Reading Coach has also been released. This is a low maintenance, stand-alone reading accelerator that students can use at school and at home on their own! Please watch the short video below for more details and share the Reading Coach poster with parents.
Click here to read the new Microsoft Updates in May.
Here is a video about the Teams Updates-they are awesome!
…and Reading Coach
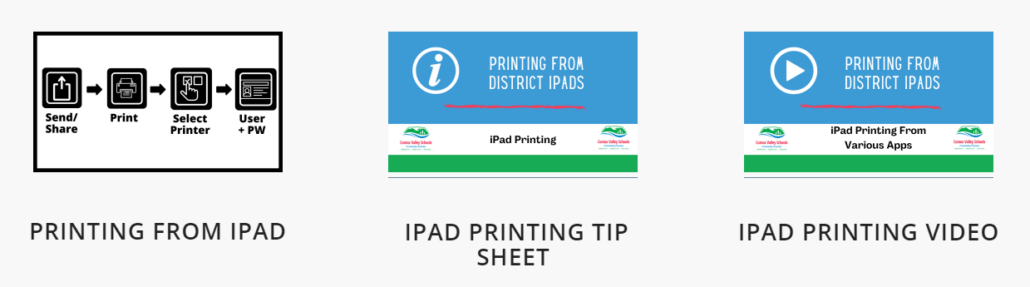
Exciting news . . . . printing can now be done from district iPads at school. Each school is assigned one printer for the iPads to print to (usually the library printer). Printing can be done from any app on the iPad although the process may be different for each one. Thank you Shannon for writing this tech tip and Jane, Shannon, John and Shaun for all of their work making this happen!
Printing from an iPad at School
Below is the link to the webpage that houses the set of instructions, both printed and in video form. Click on the image to access it. The video demonstrates how to print from a variety of apps on the iPad.
The Printing Process:
1. Open app to print from.
2. Click on the Share icon.
3. Select the Print option.
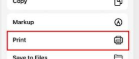
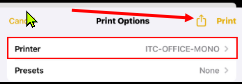
4. Select the printer (only one option listed).

5. Print.
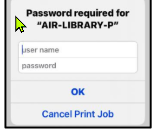
6. Sign in using the SD71 username and login (same as for logging into the computers). OK.
(Note: the process is slightly different for the Office products (Word, PowerPoint). The instructions for this are located at 1:25 in the video.)
The Inclusive Ed iPads (#35s) have all the printers listed. The specific school printer will need to be chosen to print at that location.