
Do you have a lot of files in your Teams in Microsoft Teams that you would like an easy way to access all in one place? Today is your lucky day! You can have access to all the Files sections from your Teams in File Explorer on your computer. If you make add, delete or change something in a file, you will see the changes in both places. Here are some instructions to help you out:
1. Open the Team with the files you would like easy access to.
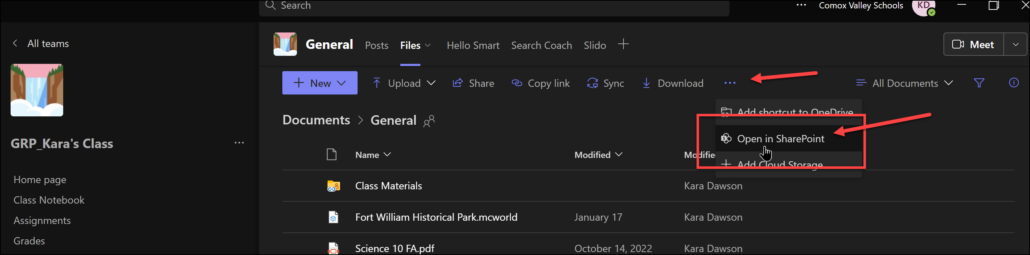
2. Open the Files Tab.
3. Click on Open in SharePoint (you may need to click on the ellipsis to find it).
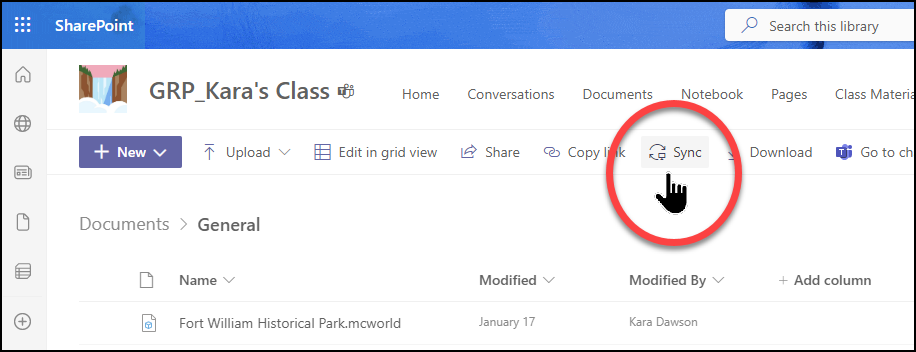
4. This will open a webpage that has SharePoint in the top left. When this opens, click on Sync:
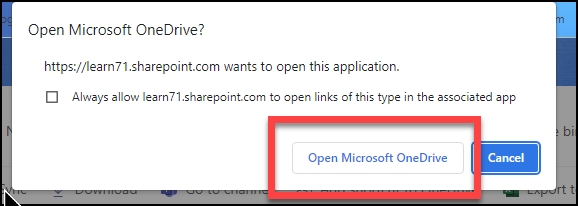
5. Click on Open in OneDrive
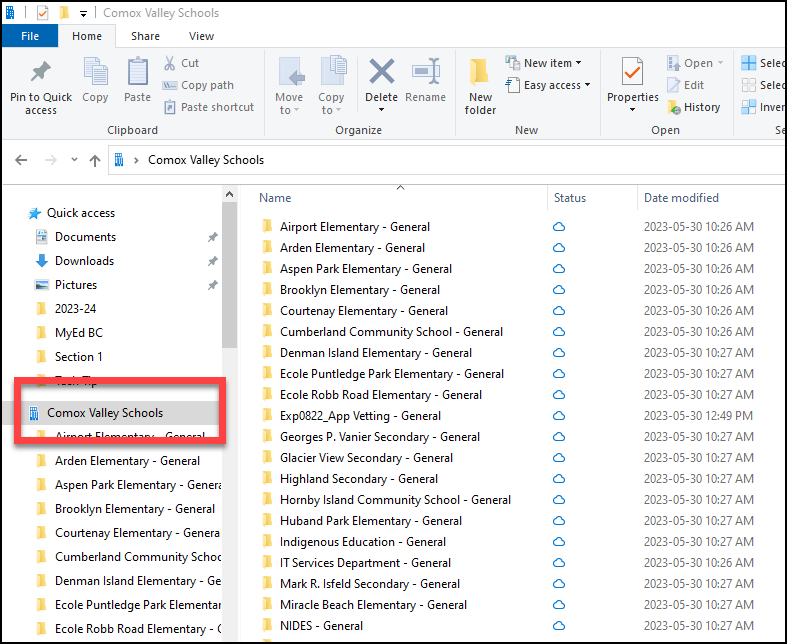
6. Now you will have access the files from that Team by going to File Explorer and clicking on Comox Valley Schools on the left (that is what mine showed up as I’m not 100% your will be the same name but the symbol will be the same).
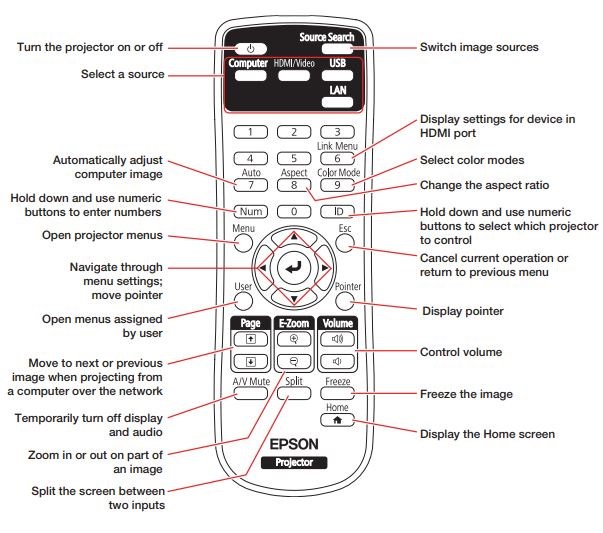
Most teachers now have some kind of projector (Brightlink/Smartboard) in their classroom and they all seem to come with the same remote. I just discovered some cool things that you can do with it and of course, I wanted to share!
Freeze – Press the Freeze button to freeze the image on the screen. Then you can use your computer to do your own work while leaving the screen frozen on what your class needs to see.
AV Mute – Temporarily turn off the display video and audio. I’ve noticed that lots of teachers use this feature to save the light bulb without having to turn the machine off and then on again in a few minutes when you need it again.
Display Pointer – Pressing this puts an arrow on the screen that you can control using the arrow buttons on the remote.
Page Up and Down buttons – These can be used to move through slides in your PowerPoint or other slide presentation. This only works if you are not using a pen: Click here for more information.
Here is a picture that explains what all the buttons do:
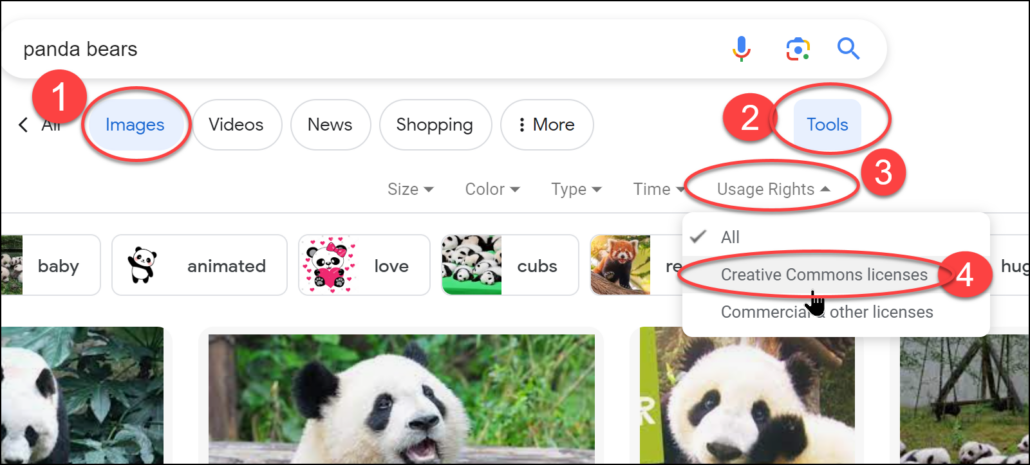
A picture is worth a thousand words! We are posting pictures and using images that we find online everyday to enhance our multimedia presentations. It is important to teach students to respect copyright and the work that people post on line. Students should be encouraged to use images that are licensed as Creative Commons or public domain.
To find these type of images in Google Chrome, follow these steps:
18 Free Image Sites and Tools for Schools
I usually check them before using the pictures because some of them would like you to put a link to their site.
Some good guidelines for using online images:
1.Give the creator of the images credit for their work (put the link from where you got the picture-you may need to actually visit the site that the picture is from as it is not acceptable to give a link to Google Images).
2. Get the pictures from a place that is designed for pictures to be shared (for example, Pixabay).
3. Use pictures at are licensed Creative Commons.