General Exploration / Maker 8
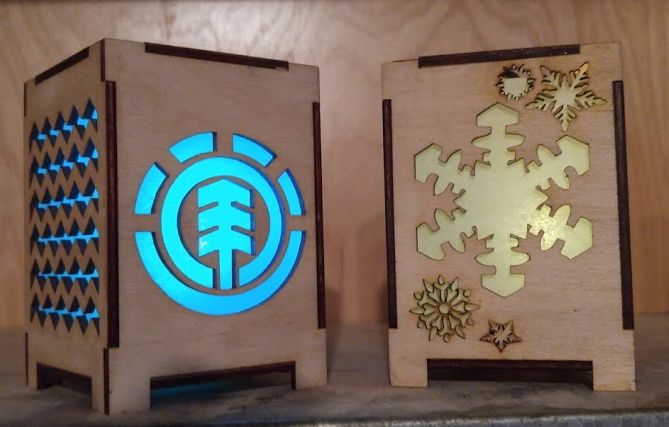
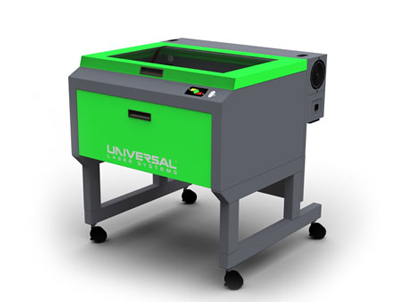
General Exploration/Maker 8 is a course that has been designed to introduce students to using their ‘head & hands’ to produce physical artifacts using a variety of software, tools and equipment. Students will use a laser cutter/engraver, learn to solder, make a circuit board and 3D print.
The main project will be an LED lantern illuminated by a small electronic circuit that fades while moving through 3 different colours.
Want Inkscape on your home computer? Follow this link.
Lantern Tutorial Series
Setup
- Tutorial 1 – File Setup
- Tutorial 2 – Downloading and Saving the Template
- Lantern-Template-Zipped << this is the file you need
- Tutorial 3 – Opening the Template in Inkscape
Images (Basic)
Editing (Basketball Example)
- Tutorial E1 – Introduction to Nodes (node manipulation)
- Tutorial E2 – Continuous Outside Lines
- Tutorial E3 – Moving Nodes As A Group
Design Options
- Tutorial D1- Removing Backgrounds (spider example)
- Tutorial D2 – Engraving (Name Example)
- Tutorial D3 – Combining Cutting and Engraving
- Tutorial D4 – Spotify Code
Using the Laser to Cut the Lantern’s Sides
- How To Move Your Design From Inkscape To The Laser’s Software
- Laser Operation Guide – Paper Design Verification
- Focusing and Cutting – a video walkthrough
Making the Electronic Circuit Board
3D Printing the PCB Holder
Click the link to the right and follow the guide…3D Printing Guide
- PCB Holder (Zipped File!)
- Want Marks? Show me the model in Tinkerine after you’ve sliced it.
Finally Project Assembly
- Sand the smoke from the laser off of the outside of all pieces using 120 grit sandpaper (do not sand the edges). Use correct technique by sanding ‘with the grain’.
- Have your teacher spray a clear coat on the outside of all pieces
- Once dry, LIGHTLY ‘dust’ all sprayed surfaces using 180 grit paper (again, sand ‘with the grain’)
- Cut pieces of translucent tracing paper and glue stick these to the inside of all lantern pieces except the bottom.
- Paper should not overhang edges and should not interfere with assembly
- Glue stick is to be applied to the wood, then wood is to be pressed onto the paper
- Using a utility knife, trim off excess paper as/where needed
- Carefully assemble the sides and top of lantern. It is intended to fit snugly and ‘snap’ together so this may take a bit of work.
- Using two #4 x 1/2″ flat head Robertson screws, attach the circuit board holder (circuit board already installed) to the bottom of the lantern.
- DO NOT install the bottom of your lantern!
- Complete the Project Self-assessment, then bring this and your lantern to your teacher for final marking.
- AFTER MARKING, insert the bottom to complete the lantern

How to 3D Model Using Autodesk Fusion 360
Fusion 360 is a ‘3D Modelling’ program that can generically be refered to as a ‘CAD’ program (Computer Assisted Design). It is professional level software, used by engineers, and designers every day. We will be exploring this software and learning how we can use it to draw objects for making.
Setting Up an Account and Obtaining An Education License
You will need to setup an Autodesk account and apply for a Fusion 360 free education license. All Autodesk software is free to students if they verify their educational status. Follow the directions in class to…
- Set up an Autodesk account (does not provide free access, only trial access)
- use your school district email address: ‘student#learn71.ca
- be sure to not use your exact birthdate (use your month and year, but another day)
- Verify your email when prompted going to your email and clicking the verification button in the mail sent to you by Autodesk.
- You will now have a free 30 day trial and this is all that we need. If you would like the free 1 year educational use, now or at any time, see me and I can set you up.
Getting Started With Fusion 360
Keep in mind the useful features built in to YouTube when working through tutorials (something you will be doing often).— Pause, rewind, slow down & speed up
Design / Make a Key Fob
- Tutorial 1 – Creating A General Shape
- Tutorial 2 – Adding a Raised Boarder
- Tutorial 3 – Creating Raised Text
- Tutorial 4 – Adding A Hole For A Key Ring
- Tutorial 5 – Creating A Technical Drawing (Orthographic Style)
Model a Lego Block
Puzzle Cube – extra for fun
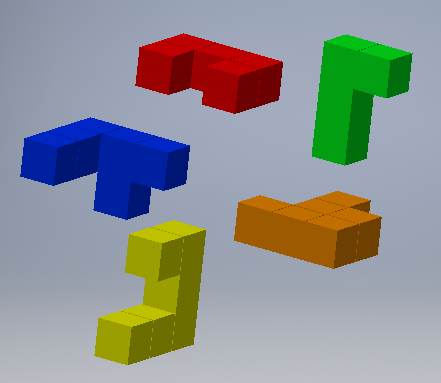
For each piece (component), start with a 1/2″ x 1/2″ cube, then copy and paste the number needed, then join to form the completed piece. See pictures below to determine cubes required and shapes to make.

Safety Unit – Tools/Procedures