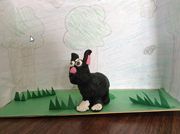
LESSON: Creating Clay Animal Photo Stories
Originally created by Colleen Devlin (Arden Elementary)
GRADES: 1-3 (Can very easily be modified to be used with any grade.)
CLICK HERE FOR LEARNING OUTCOMES COVERED
MATERIALS: In order to create your clay animals, you will need modelling clay that doesn’t harden (Plasticine), toothpicks and a method to watch utube videos in order to teach. For the Dioramas you will need boxes or poster paper and construction paper.
TECHNOLOGY: Story Creator You could also use Book Creator, My Story or any book creating app or program that allows pictures.This could also be modified to use a slide show program like PowerPoint in the computer lab.
SESSION 1: Creating the clay animals (approximately four – thirty minute lessons)
-Have students choose the animal that they wish to write stories about-you may wish to read some book about animals and brainstorm a list of animals that they can pick from.
–These animals need to be constructed in a way that they can be used over and over again as parts of them will need to be moved to change the position or expression. One lesson alone can be dedicated to creating the eyes. Some recommended utube videos to watch with your class while making these are:
https://www.youtube.com/watch?v=ocAc–CQdPw – This is more using real clay but the technique is great!
https://www.youtube.com/watch?v=romvK8lUwT4 – Again, this is clay that hardens.
SESSION 2: Creating the first “Story”
-This is more of an information story about the animals that the students have chosen. Click here to get a sheet for students to use to print their information.
-Students can fill the sheets out themselves or they can work with older buddies to find the answers.
SESSION 3: Making backgrounds
-This can be done as an art project at the same time as the second session.
-Kids will need to create a background for their pictures of their animals. It is important to make it look as much like the animal’s natural habitat as possible. Talk with your class about how they can use paper to create things like trees and lakes…
SESSION 4: Making the Photostory
-These instructions will be for using Story Creator-please see Kara Dawson (kdawson@sd71.bc.ca) if you need any help at all with this project or using another app or program to complete it.
To Create a Photostory:
- Press + and then Add Story
- Give the story a name-I don’t recommend using the kid’s name as these may be shared online afterwards.
- When you are done, press on the book to make it open up.
- On the first page, press the Text button:
 Now you can type your sentence. Younger kids may wish to have their buddies do this with them. Another option is to use Siri to convert speech to text for kids who are unable to type. T do this, press the microphone button to the left of the space bar. This may need to be edited afterwards.
 - Now students can press the microphone button to record their voice reading their sentences.
- After that. students need to move the lines by their voice to the spot where the words are said in the recording (younger kids will likely need a hand with this):

- Now get the picture which students can either take right then by pressing the camera button and then the picture of the camera, or they can take the pictures another time and use an existing picture. Notice here you can also use videos in your production!
- If the picture changes to full screen, you can drag your finger up from the bottom to bring the editing tools back up.
- There is also the option of drawing on the pages to decorate them using the 4 colours and pen on the right and the eraser beside it.
CONCLUSION:
-These pages can be easily sent home-check back for instructions here for how to do it.
-Have a popcorn party and watch the videos together!


